About Connectors
A connector provides a means to link the editor’s functionality to elements on your web page. You can have input fields, buttons, selectors on your web page and have them send commands and data to the editor. You can also have the editor send data back to your web page. For instance, if you have a TShirt color picker on your products page, you can have the element send the selected color to the editor. The editor can then use that data to change the color of the TShirt in the preview. And if the user changes the color in the editor, you can have the editor send the new color back to the color picker on your web page.We have the following connectors available:
Page Width & Height
Page Width & Height
The Page Width & Height connector captures and sets the size (width / height) of the design canvas in the editor.
When the editor loads, it will capture the set width and height from your input fields and adjust the canvas size accordingly. If the user changes the width and height in the editor, it will send the new values back to your input fields, which can be used to adjust pricing. This is useful for variable-canvas products like Banners, Verhicle Decals, Bill Boards, and other Large prints.
When the editor loads, it will capture the set width and height from your input fields and adjust the canvas size accordingly. If the user changes the width and height in the editor, it will send the new values back to your input fields, which can be used to adjust pricing. This is useful for variable-canvas products like Banners, Verhicle Decals, Bill Boards, and other Large prints.
Text Value
Text Value
The Text Value connector captures text input from your product page and replaces a specific targeted text in the editor when it loads. This is useful for personalized products like T-shirts, Mugs, or Greeting Cards, where customers can type their desired text, and the editor reflects it in the design. If the user updates the text in the editor, the new value will be sent back to your input field.
Page Count
Page Count
The Page Count connector captures and sets the number of pages the editor will load with. This is useful for products that have multiple pages, like Booklets, Catalogs, and Magazines. The editor will load the number of pages set in your input field. If the user changes the number of pages in the editor, it will send the new value back to your input field.
Page Index
Page Index
The Page Index connector allows you to display specific pages to your customers when the editor loads. For instance, if a customer selects Single Sided Business Card, you can have the editor show only the front side for the customer to personalize and hide the back side.
This can be used to show or hide any specific page in the editor.
Page Clone
Page Clone
This connector clones a single page in the editor by the number of times spectified in your input / dropdown field. For instance, if you have a product with front & back with inner pages, you can have the editor clone the inner pages to the number of times specified in your input field.
Underlay Color
Underlay Color
An Underlay color is used for products like TShirts and other apparelts where customers can select the color of the physical product. On your product page, you may have a set of color options that your customers can select. With this connector, you can pass the selected color to the editor and have it pre-select the color when it loads.
How to create a Connector
Open your Dashboard
First navigate to your the Designs section in your Print.App Dashboard.
Open Connectors Panel
On the top menu, you will find the More actions button. Clicking it will open a dropdown menu. Select Connectors from the list.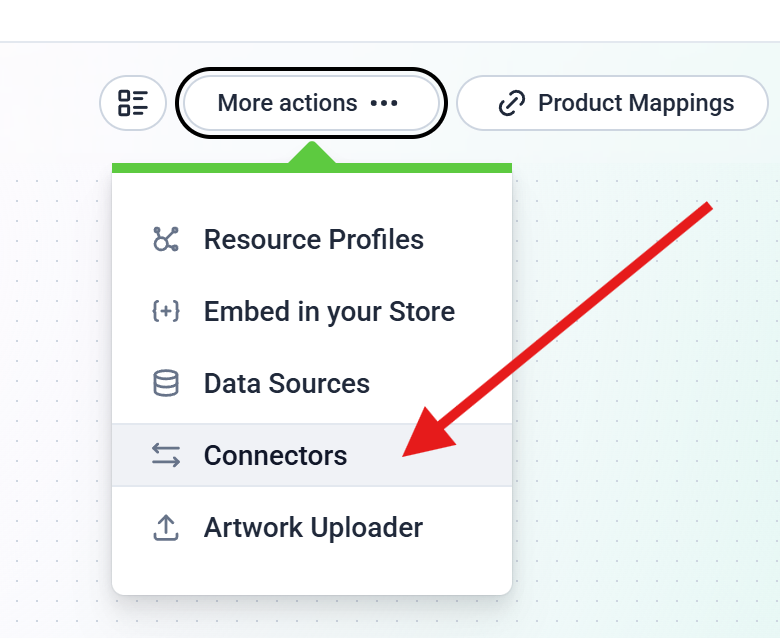 A Panel should open on the right side of your screen. This is where you can create and manage your connectors
A Panel should open on the right side of your screen. This is where you can create and manage your connectorsOpen Connectors Panel
Click on the Add a New Connector button to create a new connector. This will open a new dialog panel where you can select the type of connector you want to create.
Configure your Connector
Provide a name for your connector and select the type of connector you want to create.
Depending on the type of connector you select, you will be presented with different configuration options.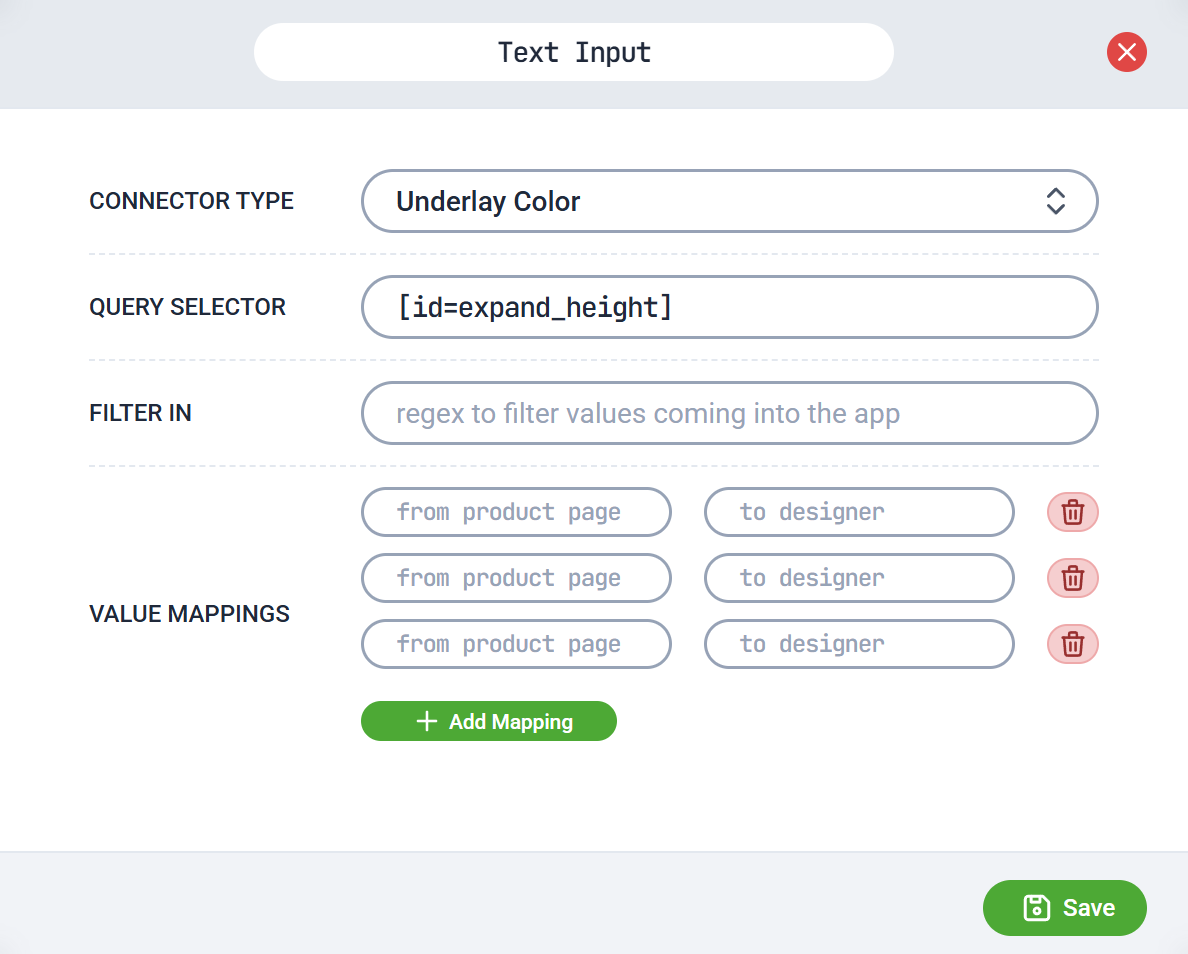
Depending on the type of connector you select, you will be presented with different configuration options.
-
Query Selector: All selectors are required to have a query selector. This is the selector that will be used to find the element on your web page. You can use any valid CSS / HTML selector here. If you are unsure what this is, you can use the Inspect Element tool in your browser to find the selector for the element you want to use or reach out to us to assist you.
- Target: This is required for a Text Value connector. This is the title of the text object on the canvas you wish to target.
-
Filter In: This is a regular expression value used to filter the values from your input field before passing it down to the editor. For instance, if you want to implement a Page Width selector and your dropdown selector has values of say:
8.6cm, 9cm, 12cm and 16cmyou will want to capture only the selected number value. You can use the filter in value of\d+to capture only the number value. You can reach out to us if you need help with this.
-
Value Mappings: This is used to map the values from your input field to the values in the editor.
For instance, if you want to set the design underlay color using colors on your page, but on your page, you have color values in names likePurple, Light Grey, Burnt Orange, and Mint Green, the computer doesn’t understand these color values.
So you will create a mapping for each color to a standard hex value that will be passed to the editor. For instance,Purplewill be mapped to#800080,Light Greywill be mapped to#D3D3D3, and so on. You can reach out to us if you need help with this.
How to use a Connector
Once a connector is created, you can assign it to any of your designs. To do this, hover over the design you want to assign the connector to and click on the Configuration button (the gear icon).This will open the design configuration panel on the right side of your screen. On the top menu, you will find the Connectors tab. Click on it and use the plus button to add the newly created connector to your design
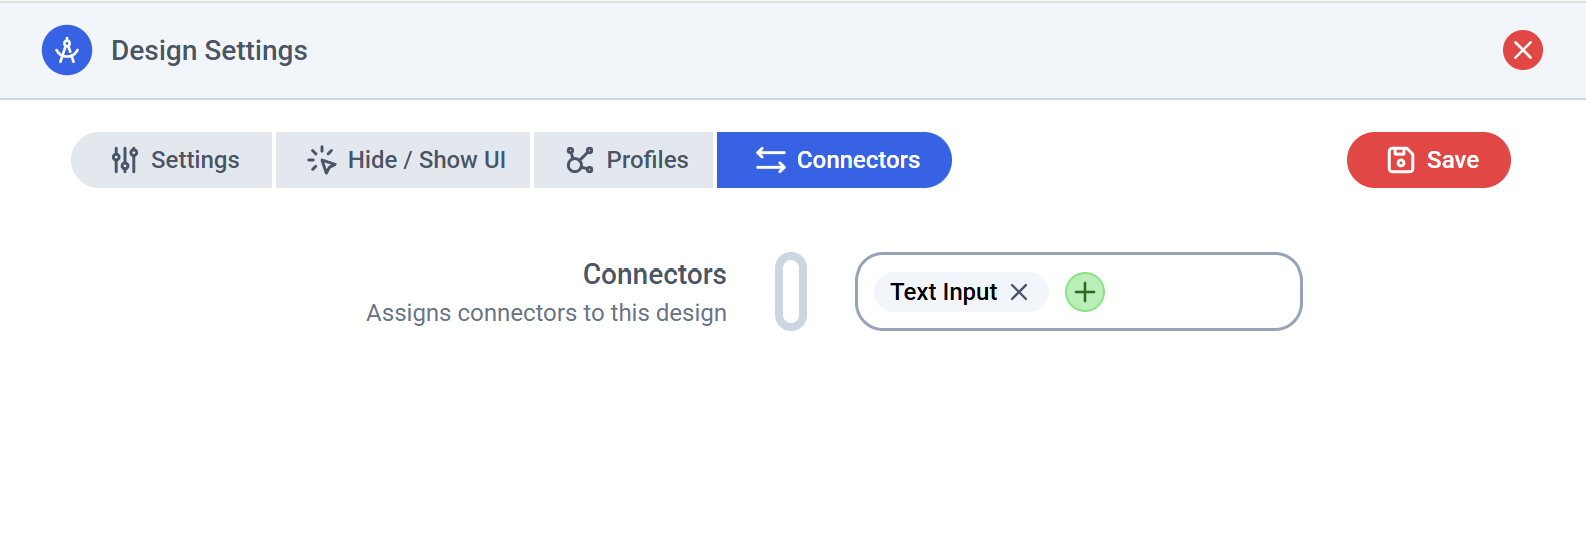
You can assign multiple connectors to a single design or the same selector to different designs
You can reach out to us if you need help with this or have any questions about connectors. We are always here to help you!