How to Generate an Embed Code
Navigate to the Admin Panel
Navigate to Designs page on the Print.App Admin Panel
Launch the Embed Code Panel
On the top menus, you will find More Actions menu. Click it to open a drop down menu. Click on the Embed Code option as shown below.

Create a New Embed Code
A Side bar will open on the right side of the screen. Click on the New Embed Code button to create a new Embed Code.
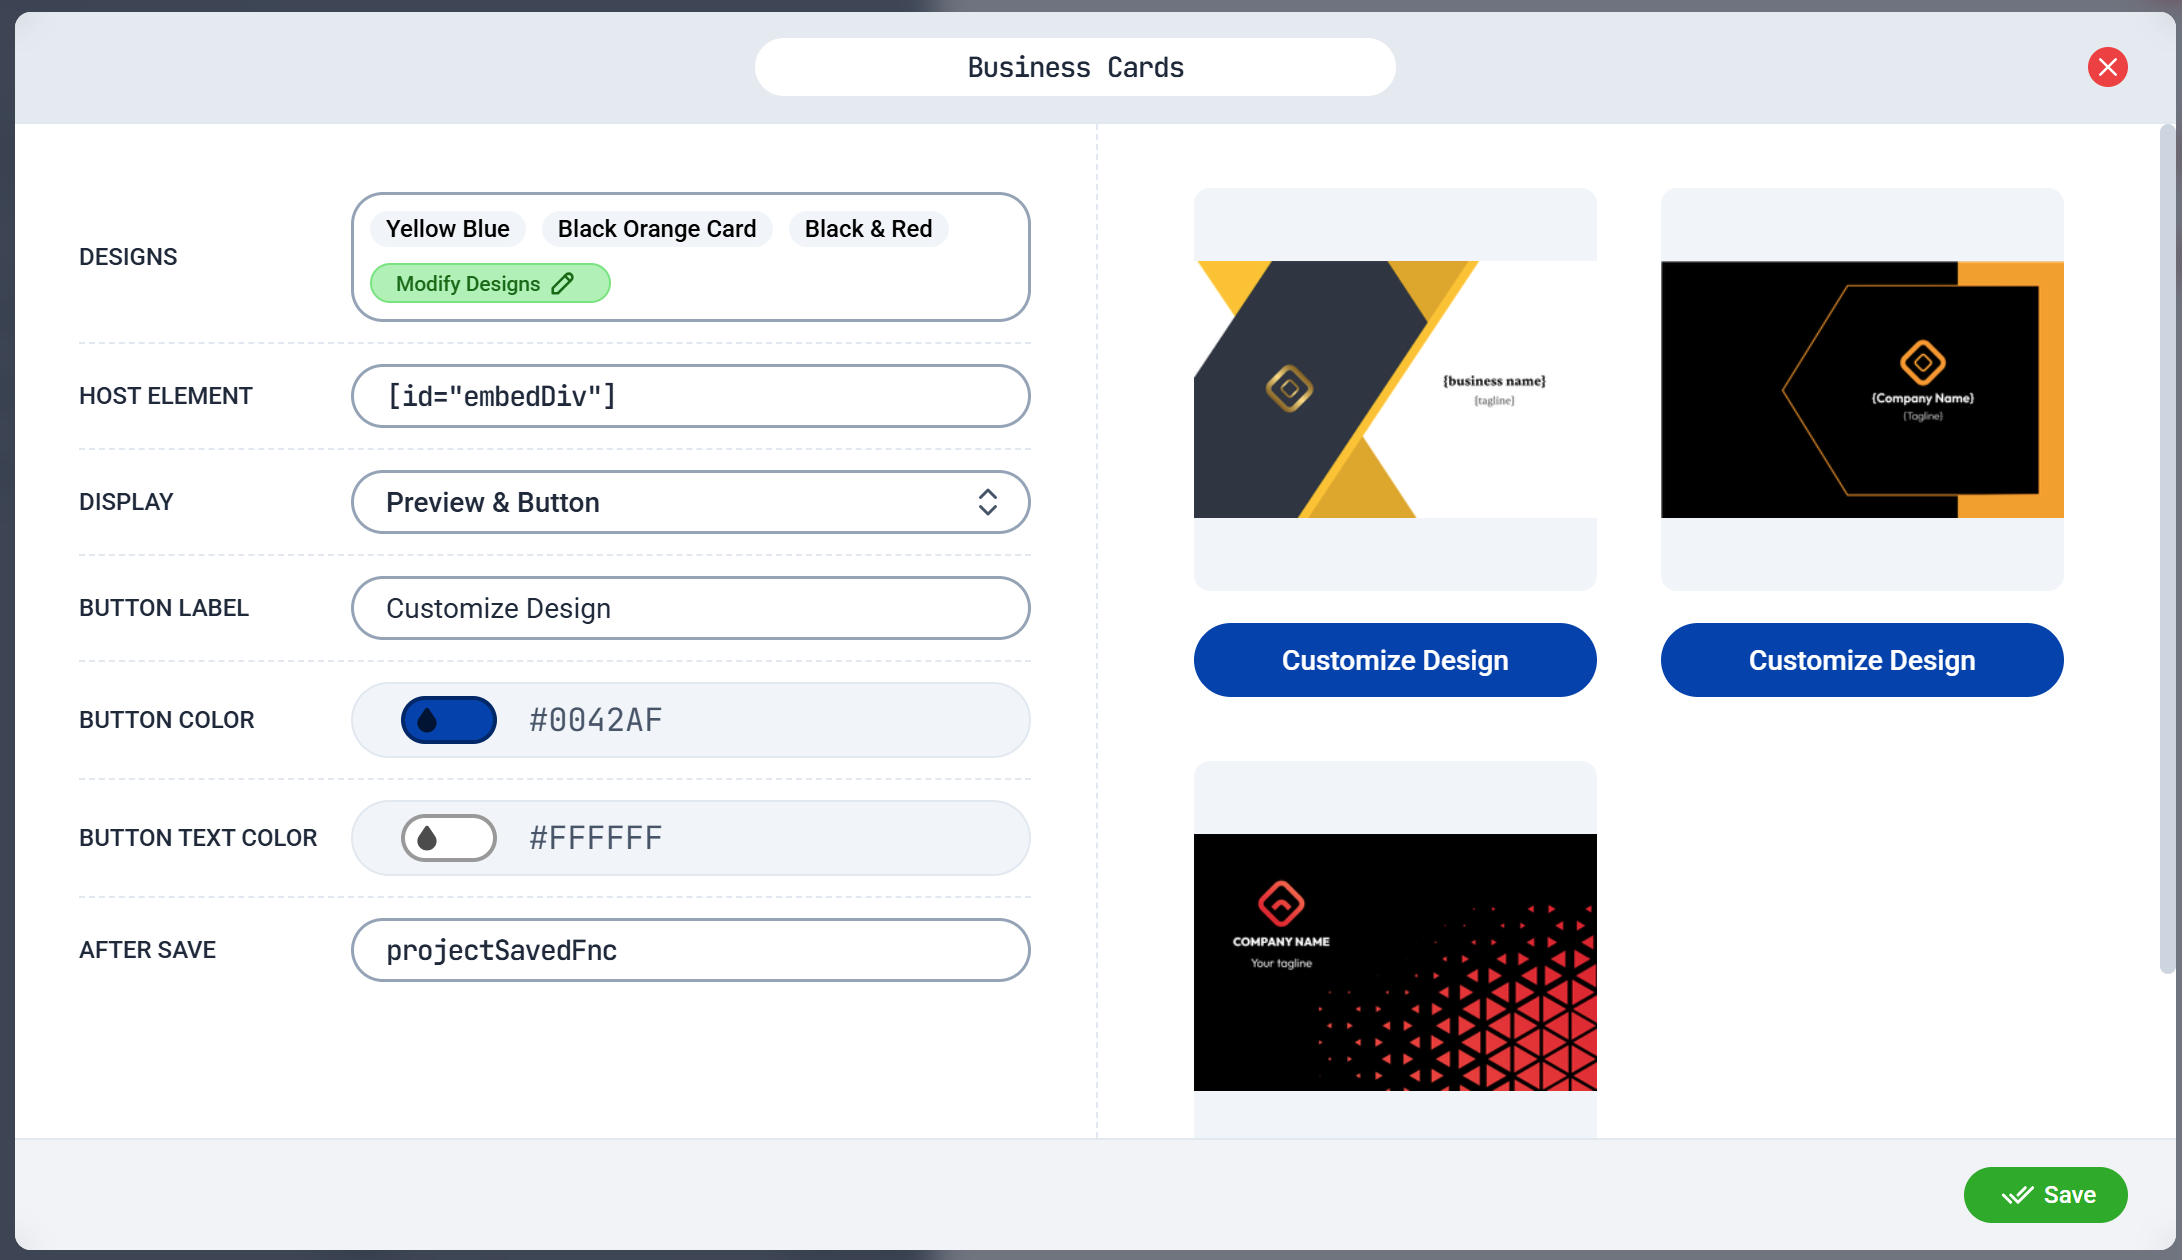
Configure the Embed Code
Enter the name of the Embed Code and select the Design you want to show.
- Name: Enter a name for the Embed Code.
- Designs: Select the Designs you want to show in the Editor.
- Host Element: You need to provide a standard HTML Query Selector for the element where you want to embed the Editor. For example, if you want to embed the Editor in a div with the id
editor, you should enter#editorin this field. - Display Mode: You can optionally show a Preview image, a Button or a combination of both.
- Button Text: If you choose to display a Button, you can enter the text you want to display on the button.
- Button Color: You can choose the color of the button.
- Button Background Color: You can choose the background color of the button.
- After Save Function: You can optionally provide a JavaScript function that will be called after the user saves the design. The function will receive the design data as an argument. This function should be asccessible from the global (window) scope.
Copy the Embed Code
After saving, you will see the Embed Code on the Side bar list. Click the Copy button to copy the code to your clipboard.